
Hot Categories
Stop Ruining Cakes! The #1 Display Fridge for Hotels?2026-10-12
Blog | 2026-09-04 08:48:02
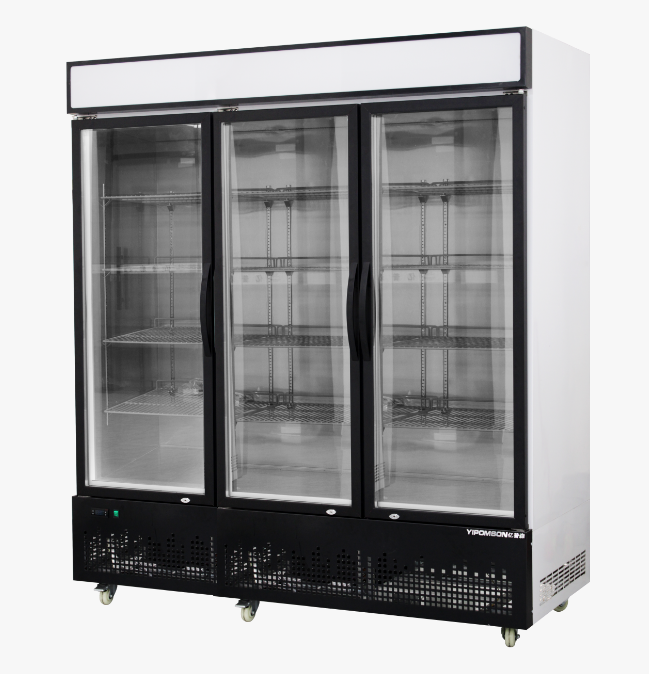
Stop ruining cakes with the display fridge trusted as the #1 choice for hotels. Designed to keep cakes fresh, flawless, and ready to serve, it combines reliable temperature control with an elegant presentation that puts every dessert in the spotlight. From delicate pastries and layered cakes to premium desserts, this fridge helps preserve texture, flavor, moisture, and visual appeal while protecting products from common display challenges. Its professional design fits seamlessly into hotel restaurants, cafés, buffets, and dessert counters, allowing guests to admire each creation before making their choice. With quality preservation and beautiful presentation in one solution, it helps hotels reduce waste, maintain high service standards, and turn every dessert display into an irresistible experience.
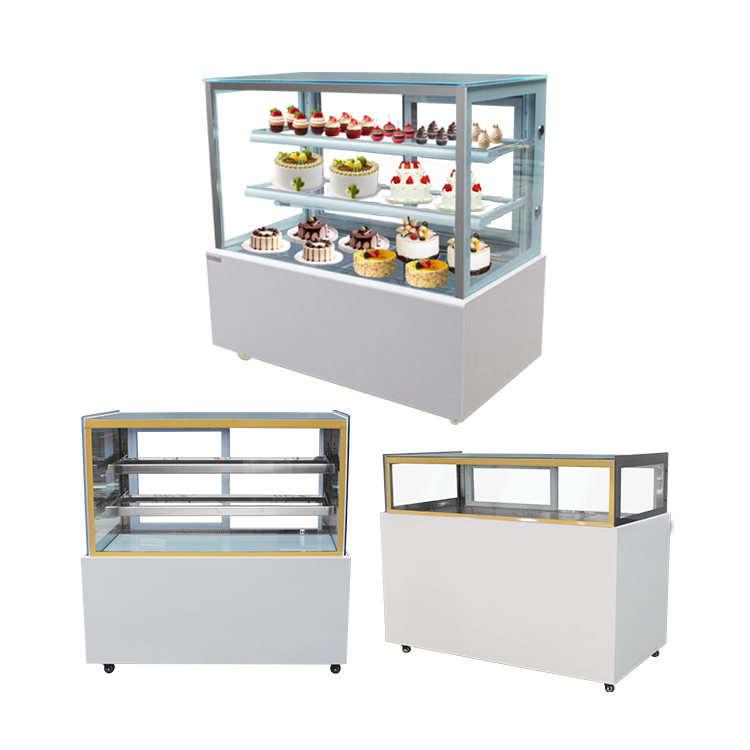
Save Every Slice with the Perfect Hotel Display Fridge
A hotel display fridge has a simple job: keep food at a suitable temperature while making it easy for guests to see and choose. When the unit is poorly planned, sliced fruit dries out, desserts lose their appeal, and staff spend extra time moving trays or checking stock.
I have found that the right display fridge can support three daily needs:
- Clear product presentation
- Reliable temperature control
- Easier stock rotation
It does not replace good food handling. It gives the kitchen and service team a better setup for protecting food quality and reducing avoidable waste.
### Start with the Food You Serve
Every hotel has a different menu. A breakfast buffet may need space for fruit, yogurt, cheese, cold cuts, and prepared salads. A lobby café may focus on cakes, sandwiches, bottled drinks, or takeaway desserts.
Before choosing a fridge, I look at:
- Product size and shape
- Tray dimensions
- Number of items displayed at one time
- Daily refill needs
- Available floor or counter space
- Customer viewing distance
A tall glass-door fridge can suit a lobby or breakfast area where guests need to browse from a few steps away. A countertop model may work better for cakes, sandwiches, and small desserts near a service counter.
A display fridge that is too small creates crowded shelves. A unit that is too large can use space that the hotel needs for guest movement, tables, or staff service.
### Make Each Slice Easy to See
Food presentation affects guest choice. When guests can see the color, shape, and portion clearly, they can make a decision without opening the door or asking staff to move items.
A clear display helps show:
- Freshly prepared sandwiches
- Cake slices and pastries
- Cut fruit
- Cheese portions
- Cold meat selections
- Ready-to-serve desserts
I prefer a layout with visible gaps between products. Overfilling may make the fridge look busy and can block airflow around the food. A simple arrangement often looks cleaner and makes refilling easier.
Use trays that match the shelf size. Place popular items within easy reach for staff. Keep delicate desserts away from areas where doors open often, since frequent temperature changes may affect texture and appearance.
### Choose Temperature Control with Care
A display fridge needs stable cooling that suits the food inside. Different products may have different storage needs, so the hotel team should check the food supplier’s instructions and local food safety requirements.
Useful features may include:
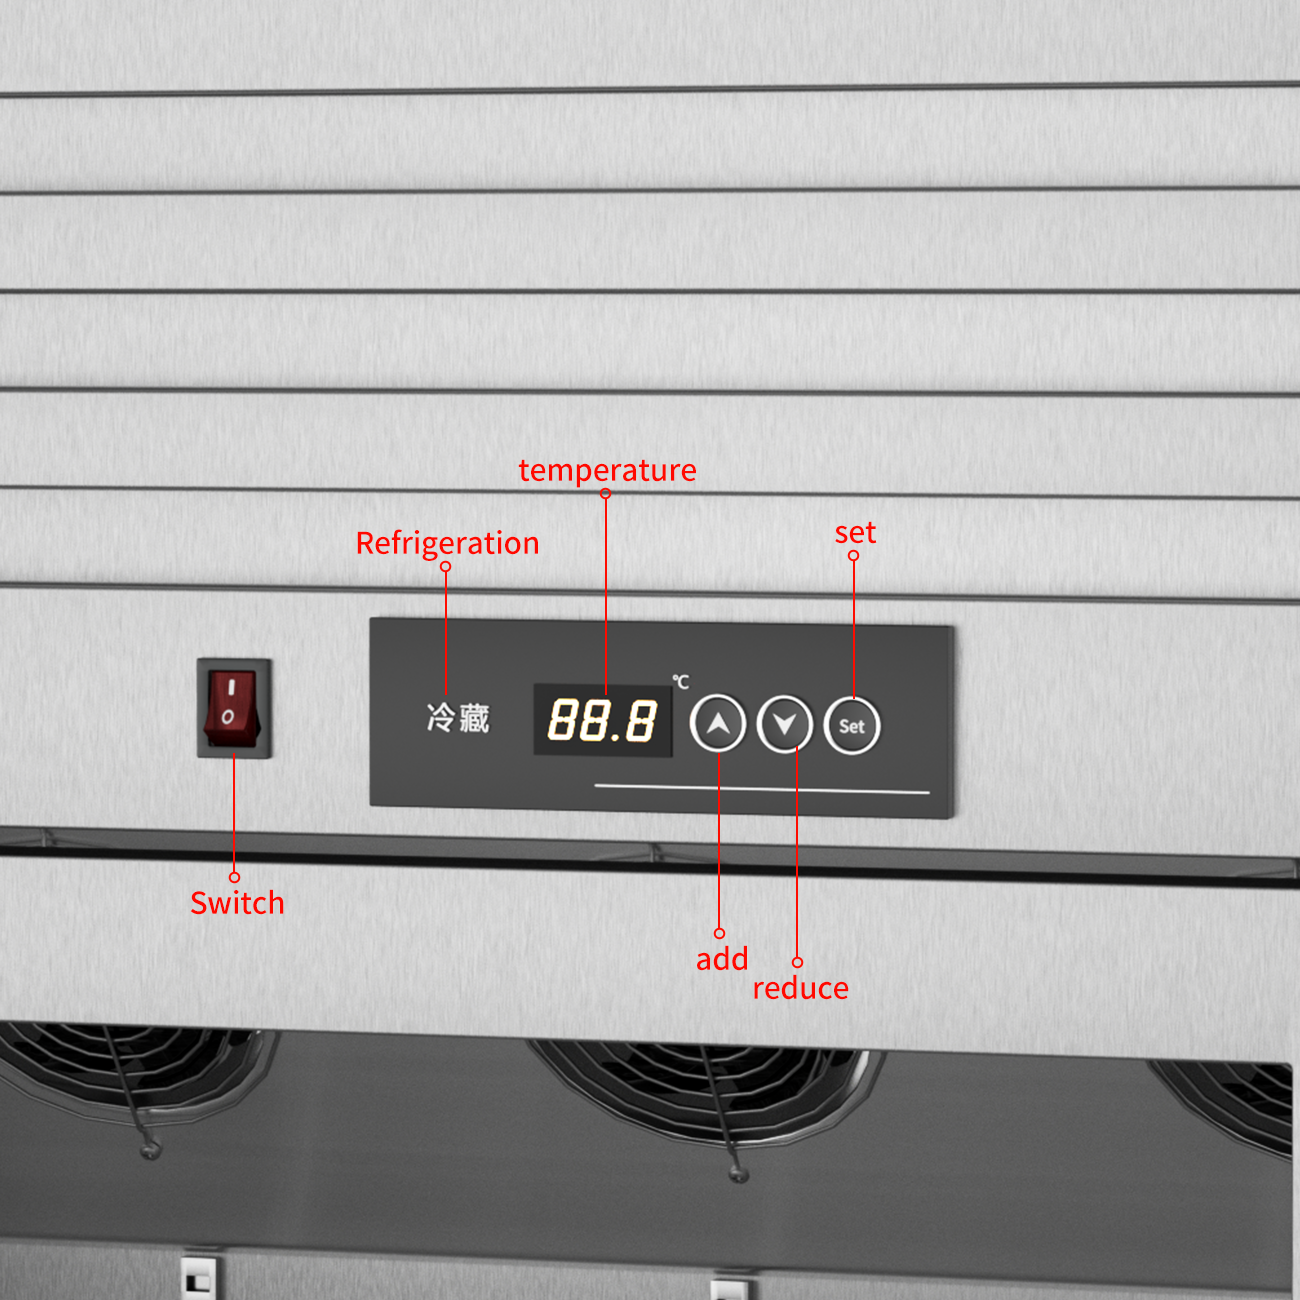
- A clear temperature display
- Adjustable shelves
- Easy-to-clean interior surfaces
- Door seals that close properly
- Even air circulation
- An alarm for temperature changes
- LED lighting with low heat output
A temperature display allows staff to check the unit during routine service. A door alarm can help when guests or staff leave the door open. These features do not remove the need for regular checks, cleaning, and stock control.
The fridge should be placed away from ovens, direct sunlight, and other heat sources. Good airflow around the outer panels also supports normal operation.
### Use the Display Fridge as a Stock Tool
A display fridge can support better stock rotation when the shelves follow a clear system.
I recommend keeping newer stock behind older stock when the product and packaging allow it. Staff can place items with the closest use-by date at the front. A small shelf label can show the product name, preparation date, or service period.
This system helps the team answer simple questions:
- Which items need to be served first?
- Which products need a refill?
- Which tray has been open the longest?
- Which foods sell well during breakfast or evening service?
A hotel may notice that some sandwich fillings move quickly in the morning while dessert slices receive more attention after dinner. The display can then be adjusted around actual guest habits rather than guesswork.
### Keep Cleaning Part of the Routine
Glass, handles, shelves, and seals collect marks during busy service. A cleaning routine helps the fridge remain pleasant to view and easier to inspect.
Staff can include these checks in daily work:
- Wipe the glass and handles
- Remove spills from shelves
- Check door seals
- Inspect trays and containers
- Confirm that air vents are not blocked
- Record temperature checks based on the hotel’s procedure
Food should be covered or placed in suitable containers where required. Staff should also follow the product’s storage instructions and the hotel’s food safety plan.
A clean display has a practical benefit: staff can spot missing labels, empty trays, and damaged packaging more easily.
### A Simple Hotel Example
Imagine a small hotel serving breakfast for 80 guests. The team places fruit, yogurt, cheese, and cold cuts in a single display fridge. At the start of service, the shelves are filled to the edge.
Guests struggle to see the products. Staff open the door often to rearrange trays. Some items remain hidden at the back, while popular items run out near the front.
The hotel changes the layout by using smaller trays, leaving space between groups, and placing high-demand foods at the front. The team also prepares smaller refill batches instead of filling every shelf at once.
This approach may make restocking more frequent, but it can give staff better control over presentation and stock rotation. It also helps the hotel avoid placing more food on display than guests are likely to choose during one service period.
### Match the Fridge to the Service Area
The best display fridge is not always the largest model. I would match the unit to the hotel’s daily workflow.
For a breakfast room, consider:
- Wide visibility from the buffet line
- Simple shelf access
- Strong door hinges and handles
- Space for trays and containers
- Easy cleaning during service changes
For a lobby café, consider:
- Compact footprint
- Low noise
- Front-facing product visibility
- Lighting that shows desserts clearly
- A design that fits the guest area
For a banquet or event kitchen, consider:
- Internal capacity
- Easy movement during setup
- Quick access for staff
- Shelf flexibility
- Compatibility with the food containers already in use
A practical choice should support the people who use the fridge every day. Appearance matters, yet service flow, cleaning, access, and temperature monitoring matter just as much.
A well-planned hotel display fridge gives each product a clear place, keeps staff work more organized, and helps guests choose with less effort. When the unit, shelf layout, food containers, and stock routine work together, hotels can present food with care and reduce avoidable handling and waste.
Keep Cakes Fresh, Beautiful, and Ready to Sell
Fresh cakes sell better when they arrive at the counter with clean edges, stable frosting, and a soft crumb. I often see the same problems in bakeries: the sponge dries out, cream starts to lose its shape, decorations shift during delivery, or the cake looks tired after a few hours in the display case.
Good cake storage is not only about keeping food cold. It is also about controlling moisture, air movement, handling, and display time.
Let the cake cool before covering it
A warm cake gives off steam. If I place it in a box too soon, that moisture can collect on the lid and soften the frosting or decorations.
I place the baked layers on a cooling rack and leave space around them. The cake should reach room temperature before I wrap or decorate it. A cake that feels cool at the center is easier to frost and less likely to develop condensation.
Cutting the cake while it is still warm can also cause problems. The crumb may tear, and the layers may lose their shape.
Protect the crumb from dry air
Air is one of the main reasons cakes lose their soft texture. Once the layers have cooled, I wrap them in food-safe film or place them in an airtight container.
For a layer cake, I use a flat, stable base before adding frosting. The base helps with lifting, transport, and display. It also keeps the bottom of the cake away from moisture on a shelf or tray.
A cake with exposed cut surfaces needs extra care. I cover those areas with film, parchment, or a sealed container so the cut crumb does not dry out.
Match storage to the frosting
Different cakes need different storage conditions.
- Cakes with whipped cream, custard, fresh fruit, cream cheese frosting, or mousse usually need chilled storage.
- Buttercream cakes may stay stable for a limited period at a cool room temperature, depending on the recipe and the surrounding conditions.
- Fondant can protect the surface, but the filling may still require refrigeration.
- Cakes with fresh berries or sliced fruit often release moisture over time, so they need careful packaging and a shorter display period.
I do not judge storage by appearance alone. A cake can still look attractive while its filling has passed the recommended holding time. I check the recipe, ingredient instructions, and local food safety guidance before setting a storage plan.
Many food safety systems recommend keeping perishable cakes at 5°C or below. Local rules may use different limits, so the bakery’s approved guidance should take priority.
Keep the display case stable
Frequent temperature changes can affect both texture and decoration. I avoid moving a cake from a warm prep area into a very cold case, then back to room temperature several times.
The display case should be clean, dry, and free from strong odors. Cakes can absorb nearby smells, especially when they are not fully sealed.
I also leave enough space between boxes and trays. A crowded case can damage piped borders, press against tall decorations, and make staff handle cakes more often than needed.
Direct sunlight is another concern. It may soften frosting, fade colors, and warm the surface of the cake. A shaded position usually gives the cake a more consistent appearance.
Use simple stock rotation
I label each cake with the preparation date, storage instructions, and any use-by guidance required by the bakery’s system. Staff can then check the oldest suitable item before placing a newer one on display.
A short display record helps me notice patterns:
- Which cakes dry out quickly?
- Which frostings lose their shape?
- How long do fruit toppings remain attractive?
- Which packaging creates condensation?
- Which products receive customer complaints?
This information helps adjust recipes, box sizes, display positions, and production quantities without guessing.
Handle cakes with care
A cake can be fresh and still look damaged if it is handled poorly. I use a firm cake board, keep the box level, and avoid stacking heavy items on top.
For delivery, I place the cake on a flat surface that does not slide. A cool transport area helps protect cream-based products, while strong air movement can dry exposed surfaces.
When a customer collects a cake, I explain the basic care instructions in plain language. The message may include:
- Keep the cake level during transport.
- Refrigerate it when required.
- Keep it away from direct heat and sunlight.
- Let chilled cake rest for the period recommended by the baker before serving.
- Return unused portions to a sealed container.
A short explanation can prevent damage after the cake leaves the shop.
A practical bakery example
Consider a 20 cm strawberry cream cake prepared in the morning. The sponge is cooled fully, the cut layers are lightly protected, and the finished cake is stored in a sealed box inside a chilled display case. The strawberries are added after the cake has cooled, and the staff member records the preparation time.
That cake is more likely to keep its shape than one left uncovered near a warm oven. The difference does not come from decoration alone. It comes from controlling each stage, from cooling to customer collection.
Check the cake before sale
Before placing a cake on the counter, I look at the sides, top, base, and packaging. I check for:
- Condensation under the lid
- Sliding layers
- Cracked frosting
- Dry or exposed crumb
- Soft decorations
- Leaking fruit or filling
- Unclear labels
- Odors from nearby foods
If the cake needs repair, I handle it before the customer sees it. Small problems are easier to manage when they are found early.
Keeping cakes fresh, beautiful, and ready to sell depends on steady habits. Cool the cake fully, protect it from dry air, use storage suited to the filling, keep the display case stable, and record holding times. Careful handling gives the product a better chance to reach the customer in the condition the baker intended.
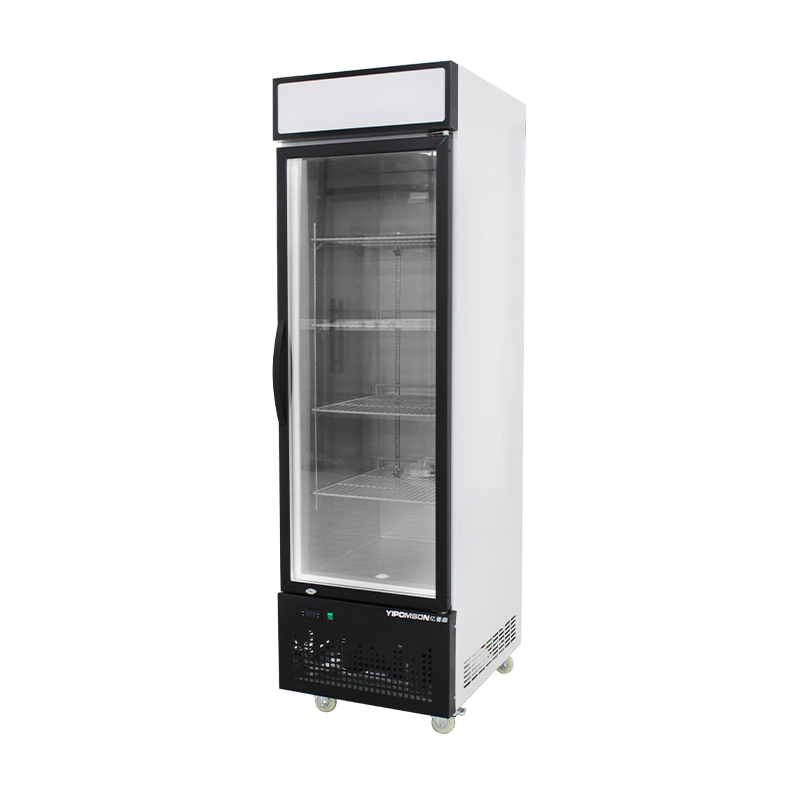
The Hotel Fridge That Makes Desserts Shine
A dessert can be beautifully made and still lose its appeal before it reaches the guest.
Cream may soften. Fruit can dry out. Chocolate may pick up odors from nearby food. When desserts sit in a busy hotel kitchen or an open service area, small storage problems can affect both presentation and guest confidence.
I have found that the right hotel fridge does more than keep desserts cold. It helps the pastry team protect texture, color, shape, and freshness from the kitchen to the display counter.
### Why dessert storage needs special care
Desserts often contain delicate ingredients:
- Fresh cream
- Custard
- Mousse
- Fresh fruit
- Chocolate decorations
- Buttercream
- Soft pastry layers
These ingredients respond to temperature changes. A cake may look firm in the morning and lose its shape after several hours near a warm preparation area. A fruit tart may develop moisture on the surface. A dessert with a strong odor nearby may affect lighter flavors, such as vanilla or cream.
A hotel dessert fridge gives the pastry team a dedicated space for finished products. That separation helps reduce handling, odor transfer, and unnecessary temperature changes.
### How a hotel dessert fridge supports better presentation
I like to look at dessert storage from the guest’s point of view. Guests notice clean lines, bright colors, neat layers, and fresh-looking toppings before they taste anything.
A suitable pastry display refrigerator can help the team:
- Keep cakes and plated desserts at a steady chilled temperature
- Protect delicate decorations from accidental contact
- Store different dessert sizes on organized shelves
- Reduce exposure to kitchen heat
- Keep products ready for breakfast, afternoon tea, room service, or events
- Make stock checks easier during busy service periods
The fridge does not replace good pastry work. It gives that work a better chance to reach the guest in the condition the chef intended.
### Choose the fridge around the dessert menu
A hotel should not select a dessert fridge based on size alone. The menu should guide the choice.
For cakes and gateaux, shelf spacing matters. Tall products need enough clearance for decoration and packaging. For plated desserts, wider shelves can make loading and removal easier. For macarons, tartlets, and small pastries, shallow trays may help the team organize portions without stacking.
If the hotel serves desserts for banquets, the storage plan may need to support trays and larger batches. A compact fridge may suit a small café corner, while a larger pastry kitchen may need separate storage for preparation, holding, and display.
I usually ask the pastry team three simple questions:
- What desserts do we prepare most often?
- How many trays need to be stored during peak service?
- Will the fridge be used for storage, display, or both?
The answers often reveal the right capacity more clearly than a product brochure.
### Keep temperature control part of the daily routine
Desserts need stable storage, not constant adjustments.
When staff load warm trays, leave the door open, or place products inside before they have cooled properly, the internal temperature can shift. Repeated changes may affect cream, mousse, chocolate, and pastry layers.
A practical routine can include:
- Cooling desserts according to the kitchen’s process before storage
- Avoiding overloaded shelves
- Leaving space for cold air to move
- Closing the door after each access
- Checking the temperature display during service
- Recording checks based on the hotel’s food safety plan
- Removing products that no longer meet the kitchen’s quality standard
The correct setting depends on the dessert recipe, equipment design, and local food handling procedures. The pastry chef and food safety team should confirm the working range for each product.
### Protect flavor as well as texture
Cold storage does not prevent every quality problem.
A dessert fridge should be kept clean and well organized. Foods with strong aromas should not share the same space with delicate pastries when separation is possible. Open containers can also expose desserts to moisture and odors.
I prefer using covered trays or suitable packaging for products that are not being displayed. Labels can show the product name, preparation date, service area, and any handling notes required by the hotel.
This simple system helps staff find items quickly. It also reduces the number of times a door is opened while someone searches for a particular cake or dessert plate.
### Make the display work for the guest
A display refrigerator should support easy viewing without making the pastry team work around it.
Glass panels can help guests see the products before ordering. Adjustable shelves can make room for different dessert heights. Interior lighting may improve visibility, though the light should not create excess heat or change the appearance of the food.
A clean display can be especially useful in:
- Hotel breakfast areas
- Lobby cafés
- Afternoon tea counters
- Restaurant dessert stations
- Room service preparation areas
- Wedding and conference events
A practical example is a hotel café that serves six types of cake, fruit cups, and small pastries each day. If the products are stacked without a storage plan, staff may move several trays to reach one item. A fridge with suitable shelf spacing allows each group to stay visible and easy to remove. Service becomes calmer, and the dessert counter looks more orderly.
### Clean the equipment on a fixed schedule
A dessert fridge can affect food quality when cleaning is delayed.
Crumbs, cream, fruit juice, and syrup may collect on shelves or door seals. These areas need attention because they are touched often and can become difficult to clean later.
A basic care plan may include:
- Removing trays before cleaning
- Wiping spills as soon as staff notice them
- Cleaning shelves with approved products
- Checking door seals for dirt or damage
- Keeping the condenser area clear when the equipment design allows it
- Allowing shelves and containers to dry before restocking
- Recording maintenance concerns for the responsible team
Cleaning should follow the equipment instructions and the hotel’s sanitation process. Staff should not use products that may damage food-contact surfaces.
### Train the team with simple rules
Good equipment can lose its value when every staff member uses it differently.
I recommend placing a short storage guide near the fridge. It can explain where to place cakes, plated desserts, fruit items, and finished banquet trays. The guide can also show which products need covers, labels, or separate storage.
New staff can learn the routine during a short shift demonstration:
- Check the product label
- Confirm the correct shelf
- Keep containers closed when needed
- Avoid blocking air movement
- Close the door after loading
- Report unusual temperature changes or equipment noise
Clear instructions reduce guesswork during busy periods.
### Look at the full cost, not only the purchase price
A hotel fridge is part of a wider operating system. The team should consider energy use, cleaning access, shelf layout, service support, spare parts, and the expected workload.
A lower-priced unit may not suit a pastry kitchen if the shelves are difficult to adjust or the door opening does not match the service area. A larger unit may also create unnecessary cost if the hotel rarely stores large dessert batches.
The best choice is the one that fits the menu, staff routine, available space, and quality standards.
When desserts arrive at the counter with clean edges, firm layers, fresh color, and an orderly appearance, guests can see the care behind the menu. A hotel dessert fridge cannot create a great dessert by itself. It can protect the pastry team’s work, reduce avoidable handling, and make daily service easier to manage.
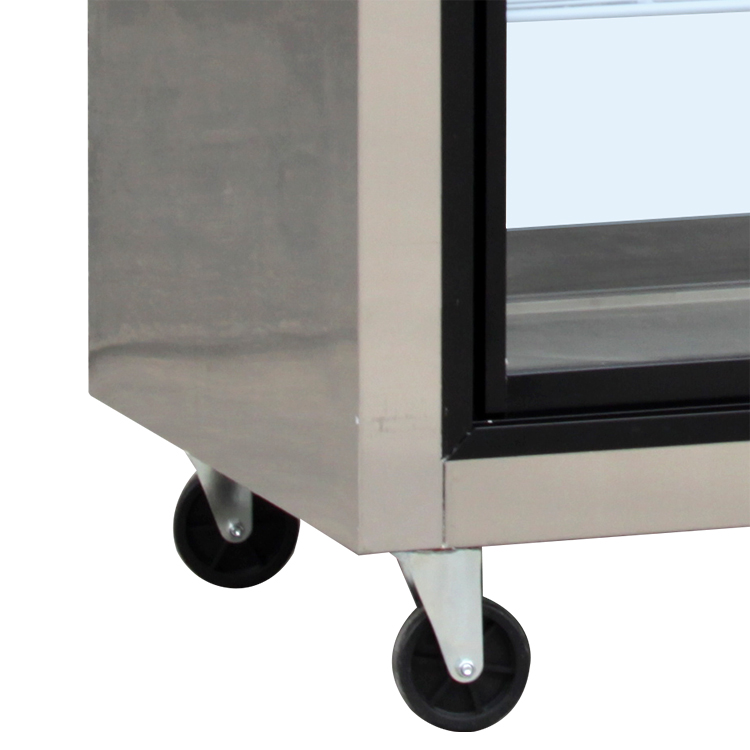
Stop Cake Damage Before It Starts
A cake can leave the kitchen looking smooth and balanced, then arrive with a cracked edge, leaning layers, or damaged decorations. Most cake damage starts before the box is closed. Heat, weak support, loose toppings, and poor handling can turn a careful bake into a stressful delivery.
I look at cake protection in three stages: build the cake well, chill it at the right time, and move it with steady support.
Build a stable base
A cake board should match the cake size closely. Leave a small margin around the edge, but avoid placing a small cake on a board that bends under its weight. A sturdy board helps spread the load and gives me a safe surface to lift.
For stacked cakes, I use supports inside the lower tier. Straws made for cake support, dowels, or food-safe support rods can help carry the upper tier. The supports need to reach the same height. Uneven supports may cause the top tier to tilt or press into the frosting.
A soft filling can also create trouble. Whipped cream, mousse, and fruit fillings may shift when the cake warms up. I keep the filling level and avoid spreading it too close to the edge. A narrow border of firmer frosting helps hold the filling in place.
Chill each layer before adding more weight
Cold frosting is easier to handle. After the crumb coat, I place the cake in the refrigerator until the surface feels firm. This gives me a stronger base for the final coat and decorations.
A chilled cake is not damage-proof. Condensation may appear when it moves into warm air, especially during humid weather. I let the cake rest inside its closed box for a short period before opening it. This helps reduce sudden temperature changes.
I also avoid placing a warm cake into a sealed box. Heat can soften the frosting, loosen decorations, and create moisture on the box interior. The cake should be cool before packing.
Secure decorations before transport
Tall toppers, fondant shapes, fresh flowers, and sugar pieces can move during delivery. I check every decoration by gently touching it. If it shifts, I secure it with a suitable amount of frosting, chocolate, or a food-safe support.
Heavy decorations need support from the cake board or an internal structure. Attaching a large piece only to soft frosting may cause the surface to crack or the decoration to fall.
For delicate decorations, I prefer a separate container. The customer can place them on the cake after delivery, or I can add them at the destination. This works well for thin chocolate pieces, fragile sugar work, and tall wafer designs.
Choose a box that fits
A box that is too large allows the cake to slide. A box that is too short may press into the top decorations. I choose a box with enough height for the cake and enough width to prevent side movement.
The cake board should sit flat inside the box. A small amount of non-slip material beneath the board can reduce sliding. The material should stay outside the food area and should not touch the cake.
I mark the top of the box when needed. A simple note such as “Keep level” can help during handling, though it cannot replace careful transport.
Keep the cake level during the trip
I place the cake on a flat vehicle surface, not on a car seat. Seats often slope, and the cake may lean during turns or stops. The floor behind the front seat can provide a steadier position when it is clean and level.
A box should not share space with loose bottles, bags, or other items. A small object pressing against the box can damage the side of the cake.
I drive with slow turns and gentle braking. Sudden movement can shift a cake even when the box looks secure. For longer trips, I check the box during a safe stop rather than opening it while the vehicle is moving.
A home baker once prepared a two-tier birthday cake with smooth buttercream and fresh berries. The cake itself was stable, but the box sat on a sloped passenger seat. After several turns, the lower tier leaned slightly and the berries moved to one side. Moving the cake to a level floor area and using a firm board would have reduced the risk.
Plan for temperature
Buttercream, cream cheese frosting, whipped cream, and chocolate decorations react differently to heat. I consider the frosting type, travel length, room temperature, and access to cooling before packing.
For warm weather, I use an insulated carrier with cold packs placed around the box, not directly against the cake. Direct contact may create wet spots or harden part of the frosting. The cake should remain protected from moisture.
I avoid freezing a fully decorated cake unless the recipe and decorations can handle it. Some fruits release water after thawing. Certain fondant pieces soften, and condensation can affect the finish.
Check the cake before it leaves
I inspect the cake from several sides:
- Are the layers level?
- Does the board stay flat?
- Are the decorations secure?
- Is the frosting firm?
- Does the box leave enough space above the cake?
- Can the cake travel without sliding?
I take a quick photo before closing the box. This gives me a record of the cake’s condition and helps me notice small changes after delivery.
The safest method is simple: build the cake on a firm base, chill it before packing, protect loose decorations, use a well-fitting box, and keep the cake level during transport. When I remove risks before the cake leaves the kitchen, I spend less time repairing damage and more time delivering the finish I intended.
Interested in learning more about industry trends and solutions? Contact yipomson: caroline@yipomson.com/WhatsApp +8613360672196.
References
- U.S. Food and Drug Administration 2022 Food Code
- U.S. Department of Agriculture 2020 Kitchen Companion Your Safe Food Handbook
- National Restaurant Association 2023 ServSafe Manager Book
- American Culinary Federation 2021 Professional Baking and Pastry Storage Practices
- Wayne Gisslen 2022 Professional Baking
- Martha Stewart Living Omnimedia 2021 Cake Decorating and Transportation Guide